10th November 2026
Printing your school newspaper or magazine: highlights from our new guide
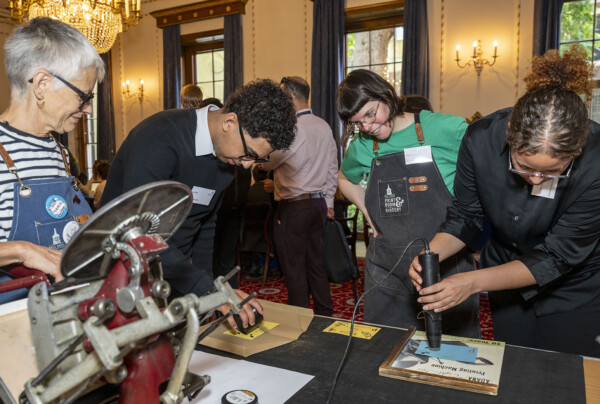
There is nothing quite like the moment the boxes arrive and your students hold the first printed copy of their magazine. Getting there can feel daunting, especially for a team printing for the first time.
So we asked two printers for their advice. Andy O’Brien of Metro Printing and Jon Tolley of Precision Proco have written a step-by-step guide for Shine teams, from first plan to finished copies.
This week’s blog post covers some of the highlights.
Start with the finished copy
Both printers suggest planning backwards. Picture the magazine your readers will hold, then work towards it. Knowing the end product early makes design easier and lets you ask printers for quotes before you set a budget.
Jon recommends agreeing a simple brief before anyone starts designing, built around four questions:
- Who is it for?
Pupils, parents or the wider community. - What can you afford?
Set a total budget and ask for prices at two or three quantities, including delivery and proofs. - What is the format?
A4 gives photographs room to breathe. A5 feels compact and portable. - When must it arrive?
Work back from your launch date and allow time for every stage, from writing to delivery.
If you want a starting point, the guide suggests A4 portrait, saddle stitched, 32 pages in total, on 130gsm silk throughout.
Choose paper you can feel
Paper changes how a magazine looks, feels and handles, so Jon’s first piece of advice is to ask for samples before you decide.
Paper weight is measured in gsm, or grams per square metre. Two papers of the same weight can still differ in thickness and feel. For the inside pages of a school magazine, 130gsm silk is a strong place to start. Its smooth surface and subtle sheen suit both photographs and longer articles.
Gloss gives a livelier, image-led look, though it can reflect under bright lights. Uncoated paper has a softer, more tactile character that suits illustration or a newspaper feel. For the cover, you can use the same paper throughout or choose a heavier 200 to 250gsm stock.
Why pages come in fours
A stapled magazine is made from sheets folded in half, and each folded sheet gives you four pages. That is why a saddle-stitched magazine runs to 16, 20, 24 or 28 pages and never 18. This kind of binding suits shorter magazines of up to around 50 pages.
Thicker publications are usually perfect bound, with the pages glued into a wraparound cover to give a square spine. These can often be made in multiples of two, though your printer will confirm what their equipment allows.
One tip from the guide is worth trying at your next team meeting. Fold a few sheets of paper into a dummy, number every side and map out where the cover, contents, features and final page will go. Remember that blank pages and covers count too.
Get the artwork right
A few technical habits will keep every page looking crisp.
- Bleed
Extend backgrounds and edge-to-edge images about 3mm beyond the page edge, so nothing white shows after trimming. - Safe area
Keep text, logos and page numbers at least 5mm inside the edge. For comfortable reading, the guide suggests outer margins of 12 to 15mm on A4. - The gutter
Wide images can run beautifully across a spread. Keep faces, words and logos away from the centre fold, where they can be lost. - Sharp images
Aim for around 300 pixels per inch at the size the photograph will print. Use original images, never screenshots or pictures copied from social media. - Colour
Printers use CMYK inks and very bright screen colours can look duller on paper. Ask your printer for their colour settings.
Designing in Canva?
Many Shine teams design in Canva, so Andy has set out the settings to use. Go to Share, then Download, and choose PDF Print with CMYK selected and crop marks and bleed ticked. Once the file has downloaded, open it and check every page before it goes anywhere.
Andy also points out that if you design in Canva, you can print through Canva too. Orders submitted through the platform can reach the press faster than a job ordered by hand.
Before the files leave school
Check your file carefully before it goes to the printer. Even when a printer sends a proof, they may charge for changes made after that point. The guide recommends printing a folded dummy to check the page order, asking a second person to read it through and agreeing final approval with a teacher.
When you ask for a quote, be precise. The guide suggests wording along these lines:
“We are producing an A4 school magazine: 28pp text plus a 4pp cover, 130gsm silk inside, saddle stitched. Please quote for our quantities and advise on cover stock, bleed, PDF settings, proof options and delivery.”
There is also a final handover checklist for the last team meeting before the files go, covering everything from budget and deadline to bleed, fonts and proof sign-off.
Read the full guide
These are just a few of the highlights. The full guide also covers finishes such as foil and lamination, four page layouts to try, exporting a print-ready PDF and what to check when your copies arrive.
Our thanks to Andy O’Brien at Metro Printing and Jon Tolley at Precision Proco for sharing their expertise with Shine students.
Join us in 2027
We’d love your students to be part of the Shine School Media Awards next year. We’re accepting registrations for the 2027 competition right now, just tap on the link below.
Entry deadline: 7th May 2027
Do you have any questions? Email us direct at shine@stationers.org
Best wishes,
Richard Chapman
Chair, Shine School Media Awards